Docking
Neovest lets you arrange your windows in one of three different styles using the "Windowing Style" feature.
Once you decide from the Windowing Styles of "Floating," "Container," or "Docking," you may apply the style to your entire Neovest application.
The Docking Windowing Style lets you dock "Floating" windows within the frame of other windows. This functionality lets you contain a number of Floating windows within one window while still allowing them to float separately.
Once you dock a number of Floating windows, you may (1) open multiple Floating windows within one container, (2) arrange the Floating windows to your specifications, (3) cause a window to float outside the container, (4) use the Floating windows to create one layout, (5) minimize and maximize all docked Floating windows simultaneously, and (6) minimize and maximize your entire Neovest application with a single click.
Neovest generates a tab that associates all docked Floating windows together. Neovest also creates a custom toolbar that lets you organize icons for easier accessibility.

Note: For information regarding other Neovest Windowing Styles, refer to the "Floating" and "Container" sections of the "Menu" chapter in Neovest's Help documentation.
Enabling the Docking Windowing Style
The following instructions explain how you may select Docking as your Neovest Windowing Style:
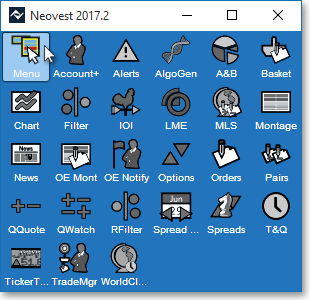
Click the "Menu" icon on Neovest's Launch Pad.
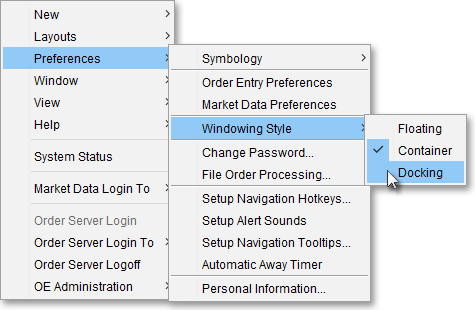
Select Preferences | Windowing Style | Docking.
Note: Once you select this feature, a "Message" box will appear with a notification to restart Neovest for this feature to take effect. Once you restart Neovest, a single window will appear and will contain any Neovest windows you choose to open.
Arranging Open Neovest Floating Windows in the Docking Windowing Style
The following instructions explain how you may arrange open Neovest Floating windows within the Docking Windowing Style:
With the Docking Windowing Style enabled, click on a Neovest window on the Docking Windowing Style toolbar.
Note: Once you click on a window, the window upon which you clicked will fill the Docking container window.
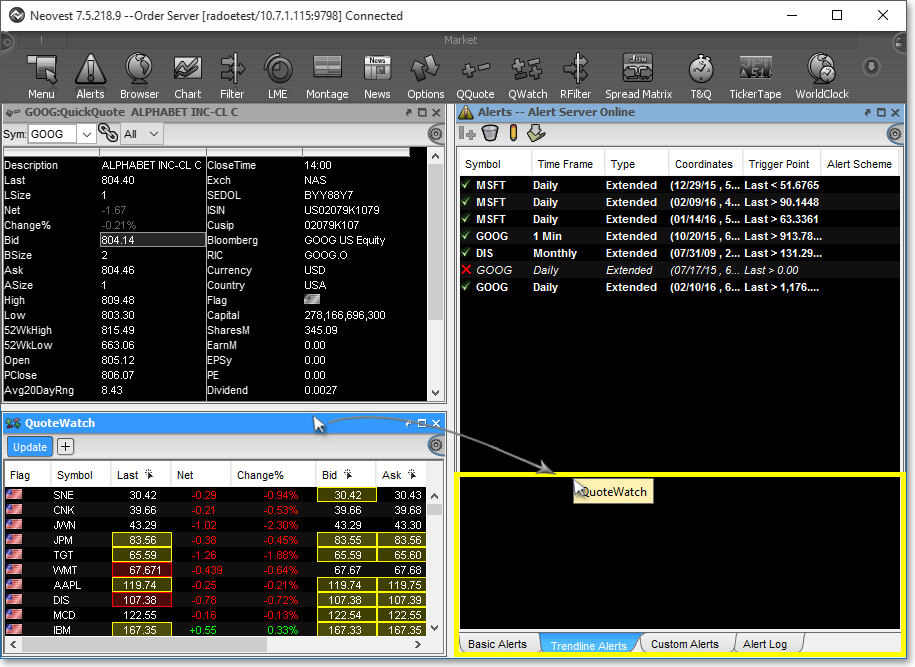
Next, click and hold on another Neovest window on the toolbar and drag the name of the window to a location on the first window you opened. As you drag the name of the window, yellow containment boxes will appear, indicating where you may place the second window.
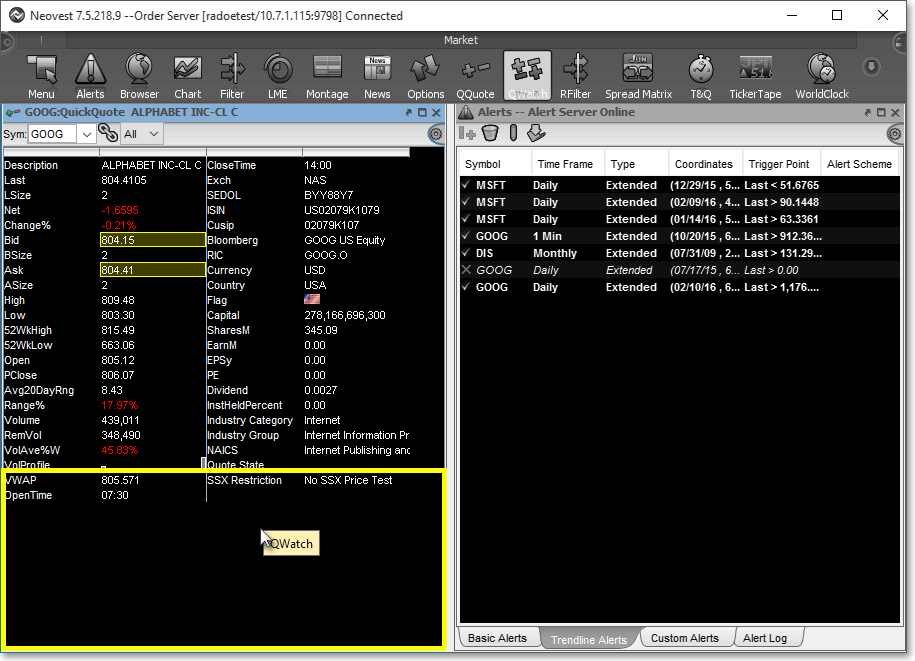
Release the left mouse button within the yellow containment box where you wish to place your second clicked-on window. Your selected Neovest window will then open in your desired location.
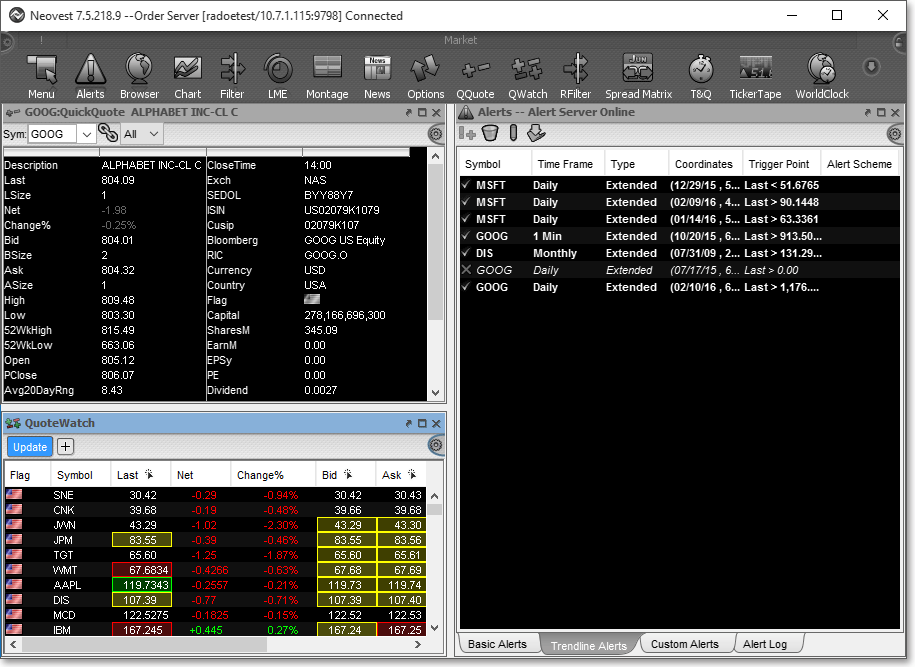
Follow the previous instructions to open and place additional Neovest windows in the locations you desire within the Docking Windowing Style container.
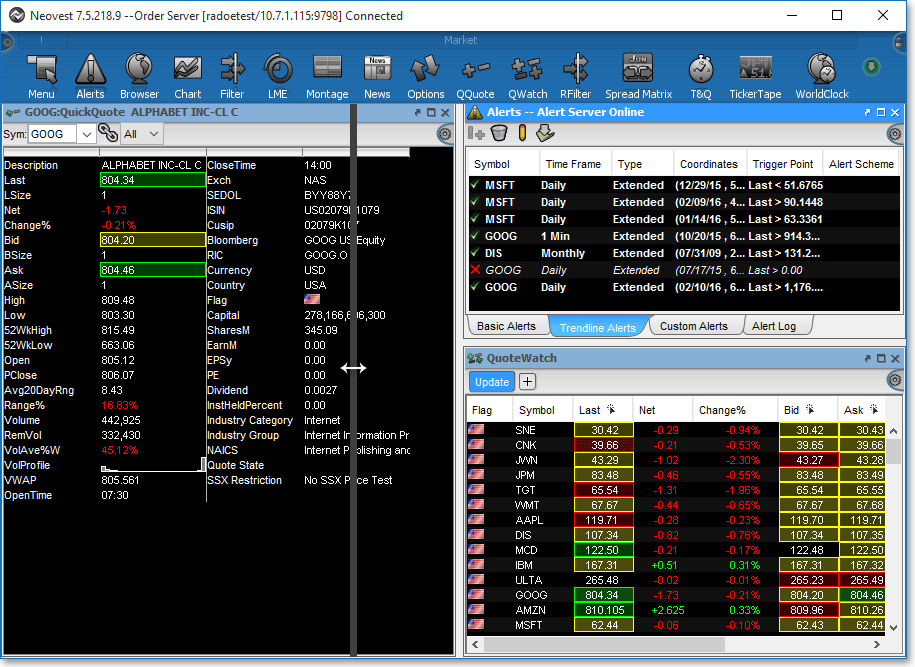
Note: To reposition an open and placed Neovest window within the Docking container, click on the blue bar at the top of the window, and drag the window to the new location you wish.
Note: Also, you may resize an open and placed Neovest window by clicking and dragging its edges to your desired dimensions. Doing so will change the proportions of neighboring windows.
Undocking and Docking Neovest Windows
The following instructions explain how you may cause a Neovest window to float separately outside the Docking Windowing Style container (undock) and then dock the window again:
Click the Undock icon located in the upper-right corner of the open Floating window that you wish to undock from the Docking Windowing Style container.

Note: Once you undock a window, the window will float independently outside the container.
To dock a Floating window that has been undocked from a Docking Windowing Style container, simply click on the Dock icon located in the upper-right corner of the window.

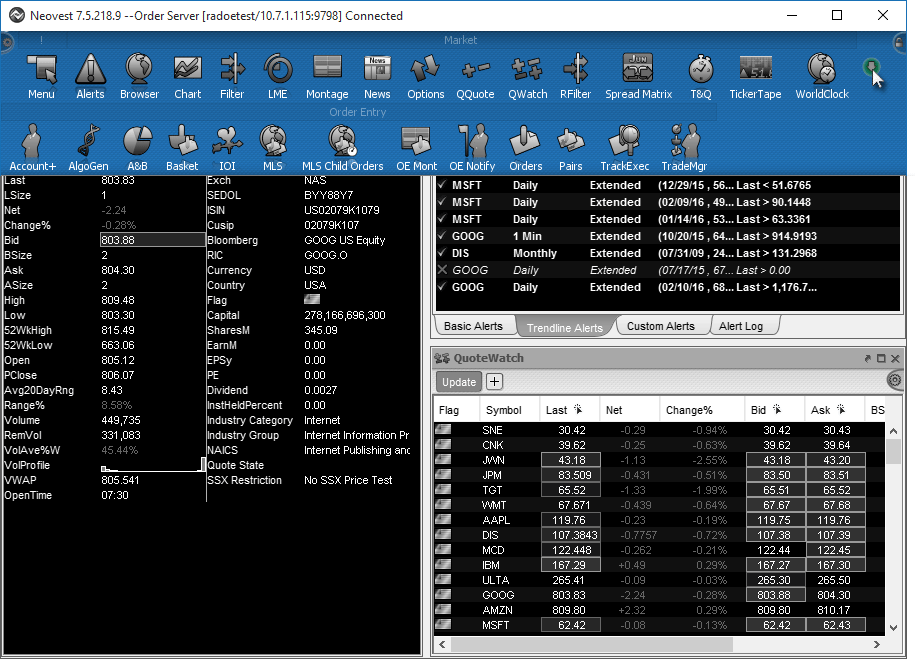
Docking Windowing Style Container Toolbar Features
The following table describes the function for each feature and icon used to customize Neovest's Docking Windowing Style container toolbar:
| Feature: | Description: |
Preferences |
Shows Neovest's Main Menu. |
Toolbar Customization Mode |
Shows/hides various toolbar customization features. Once you click on this icon, the following icons described in this table will be revealed. |
New Tool Group |
Lets you create a new group of Neovest windows. Once you click this icon and name your new group, you may drag Neovest windows into the group. |
Help |
Reveals the "Tool Bar Hints" menu. | Group Name |
Lets you enter a new name to replace the default name of "Market," into which a number of Neovest's windows are grouped. To rename the Market group, double-click on the existing name and enter a new name in the "Rename Group" box that appears. |
Remove |
Lets you remove a group name that does not contain any Neovest windows. |
Make Favorite |
Lets you indicate a group of Neovest windows as a favorite. This ensures that the group will be displayed always if the space allows. |
Favorite |
Indicates that a group of Neovest windows is a favorite. |
Show |
Shows the remaining groups of Neovest windows that do not appear due to space constraints. Groups that are not marked as a favorite may be accessed only by clicking this "Show" icon. |