Adding Action Buttons to Action Button Panels
Once you have added one or more Action Button panels to a selected tab in a Neovest Trade Manager window, you may begin to add Action Buttons to the panels.
The following instructions explain how you may add an Action Button to an Action Button panel in a selected tab in a Neovest Trade Manager window:
Click with the right mouse button on an Action Button panel.
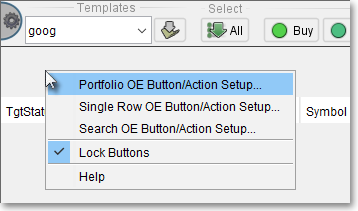
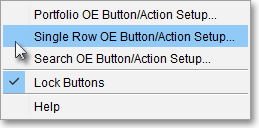
Select one of the OE Button/Action Setup options from the menu that appears. (In the following example, "Single Row OE Button/Action Setup" is used.)
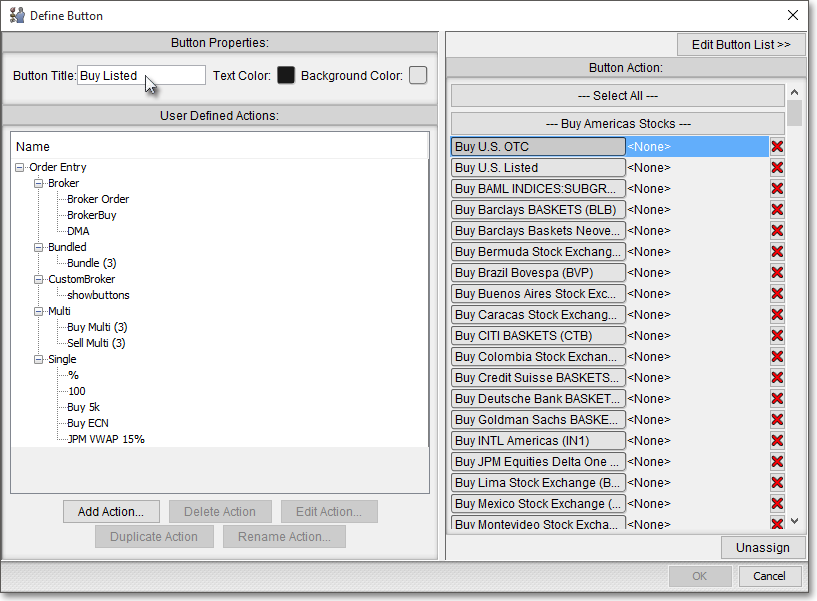
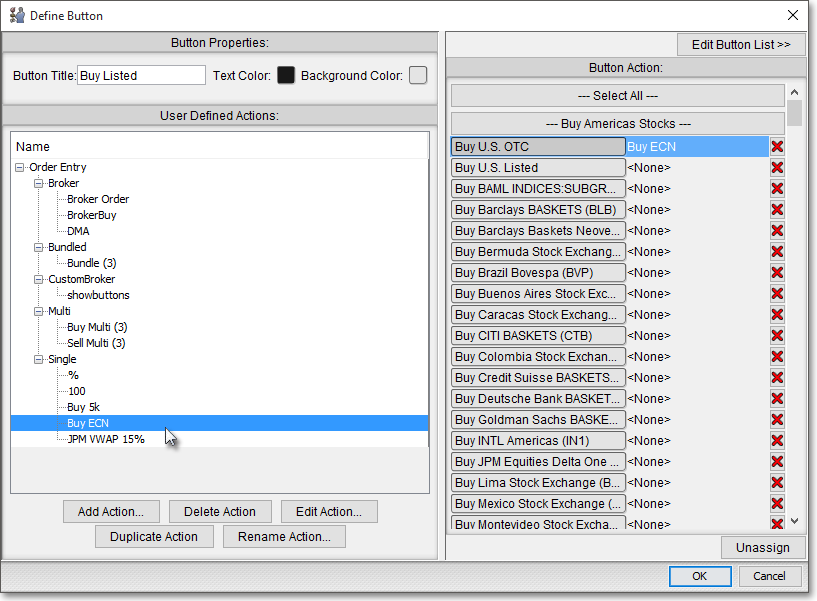
Once the "Define Button" box appears, enter the name in the "Button Title" field that you wish to give the new Action Button. (In the following example, "Buy Listed " is used as the name.)
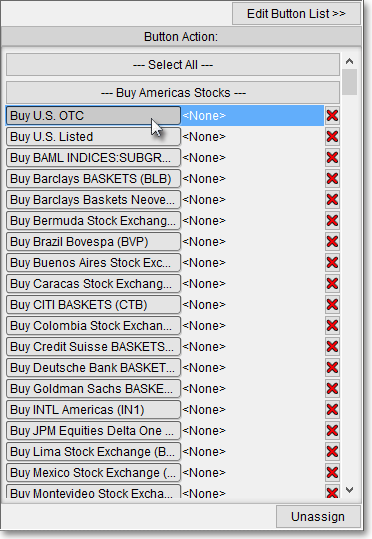
Click on Buy U.S. OTC.
Note: For information regarding how you may create actions for each of the categories in the "Button Action" section, which you may then assign to an Action Button, refer to the "Creating an Order Action" section in the "Trade Manager" chapter of Neovest's Help documentation.
Click on the action in the "User Defined Actions" field that you wish to assign to the current Action Button, and click OK. This will add the new Action Button to the Action Button panel in the selected tab of a Neovest Trade Manager window.
The "Define Button" box contains several features that let you further customize a specific Action Button.
The following table provides descriptions of the features in the "Define Button" box:
| Feature: | Description: |
| Button Title | Lets you enter a name for the Action Button. |
| Text Color | Lets you change the text color of an Action Button. Once you click on the "Text Color" square, the "Choose a Color" box will appear. The "Choose a Color" box contains three tabs: "Swatches," "HSB," and "RGB." The "Swatches" tab lets you select one of several color "swatches" to replace the existing text color of the Action Button. The "HSB" and "RGB" tabs let you edit the color of the selected swatch. If at any time you do not like the color of the swatch you selected or you do not like the color changes you have made to the swatch itself, click Reset to return to the existing text color of the Action Button. Once you have finished selecting the text color you wish for the Action Button, click OK. |
| Background Color | Lets you change the background color of an Action Button. Once you click on the "Background Color" square, the "Choose a Color" box will appear. The "Choose a Color" box contains three tabs: "Swatches," "HSB," and "RGB." The "Swatches" tab lets you select one of several color "swatches" to replace the existing background color of the Action Button. The "HSB" and "RGB" tabs let you edit the color of the selected swatch. If at any time you do not like the color of the swatch you selected or you do not like the color changes you have made to the swatch itself, click Reset to return to the existing background color of the Action Button. Once you have finished selecting the background color you wish for the Action Button, click OK. |
| Button Action | Lets you assign
OTC, listed, futures, non-US exchanges, Bulletin Board symbols, and other actions to a particular Action Button. Using
the features in the "Button Action" section, you may assign
one action for each of the above categories to the same Action Button.
Once the Action Button to which you have assigned actions for each
of the above categories appears in a Trade Manager window—you may
then enter an OTC, a listed, a futures, a non-US exchange, or any other
type of symbol in the Trade Manager window, click on the Action Button, and Neovest
will activate the action that is associated with the entered symbol. For
instance, if you enter "MSFT," which is an OTC symbol, in a Trade Manager window and you click on an Action Button to which you have assigned an "OTC" action, then Neovest will activate the "OTC" action and will populate a "Confirm" box with the "OTC" order information you have specified. Note: For information regarding how you may create actions for each of the categories in the "Button Action" section, which you may then assign to an Action Button, refer to the "Creating an Order Action" section in the "Trade Manager" chapter in Neovest's Help documentation. |
| Add Action | Lets you add a new action to the "User Defined Actions" section. Once you click Add Action, the "Create New Action" box will appear. For information regarding the features in the "Create New Action" box, refer to the "Creating an Order Action" section in the "Trade Manager" chapter of Neovest's Help documentation. |
| Delete Action | Lets you delete the action that you have highlighted in the "User Defined Actions" section. |
| Edit Action | Lets you edit the action that you have highlighted in the "User Defined Actions" section. Once you click Edit Action, Neovest will open the necessary box or boxes that contain the existing order parameters of the highlighted action. Once the box or boxes appear, simply (1) change the order parameters on the drop-down menus and (2) manually enter the new order parameters in the fields that allow you to enter order information manually to change the order parameters of the highlighted action. For more information regarding specifying order parameters for a particular action, refer to the "Creating an Order Action" section in the "Trade Manager" chapter of Neovest's Help documentation. |
| Duplicate Action | Lets you duplicate the action that you have highlighted in the "User Defined Actions" section. Once you click Duplicate Action, Neovest will duplicate the highlighted action and will add a "1," "2," or "3," etc. (depending on the number of times you have duplicated the action) to the end of the duplicated action's name. |
| Rename Action | Lets you rename the action that you have highlighted in the "User Defined Actions" section. Once you click Rename Action, the "Rename Action" box will appear. Simply enter the new name that you wish to give the highlighted action, and click OK. |