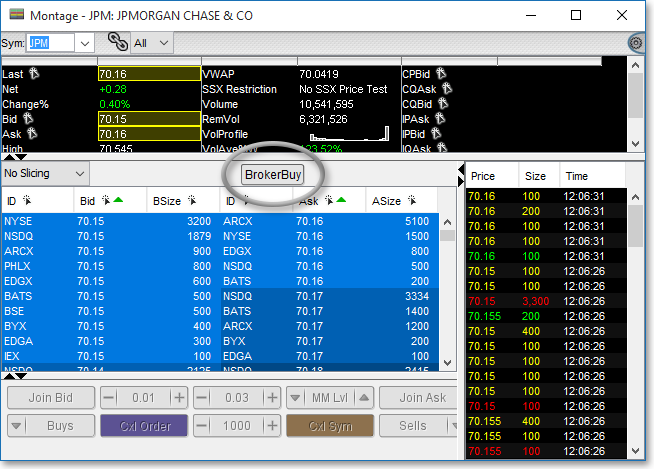
Swappable Action Button Panels
Neovest's Swappable Action Button panels let you assign different sets of Action Buttons to selected symbols in a Montage window.
The following instructions explain how to enable a Swappable Action Button panel:
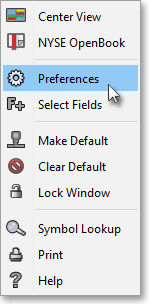
With a Montage window open on your screen, click the gear icon, located on the far-right of the toolbar.

Click the "Preferences" icon on the drop-down menu that appears.
Once the "Montage Preferences" box appears, select the "Actions" tab.
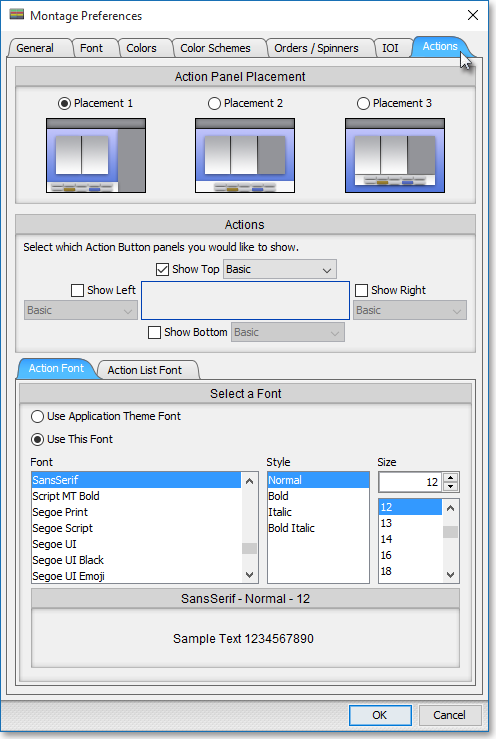
Select whether you would like your Swappable Action Button panel to be located at the "Top," "Bottom," "Left," and/or "Right" of a Neovest Montage window.
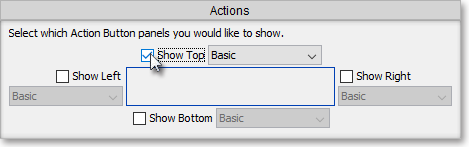
In the drop-down menu located to the right of the box you just selected, indicate whether you'd like your Action panel to be "Basic," or "Symbol Swappable."
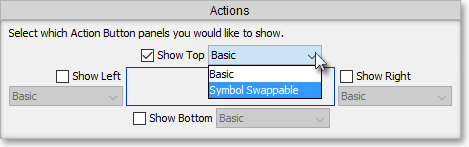
Note: A "Basic" Action Button panel will enable the Action Button function regardless of the symbol entered into a Montage window.
Once you have finished selecting which Action Swappable panels to add to your Montage window, click OK.

The following instructions explain how to create a Symbol Swappable Action Button panel:
Right-click a Swappable Action Button panel.
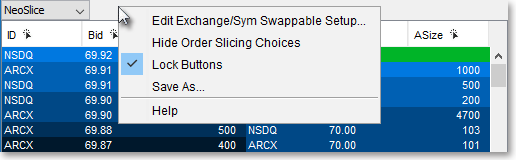
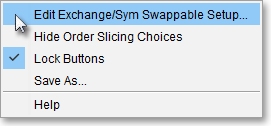
Select Edit Exchange/Sym Swappable Setup from the menu that appears.
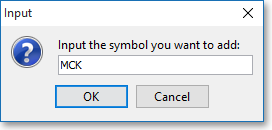
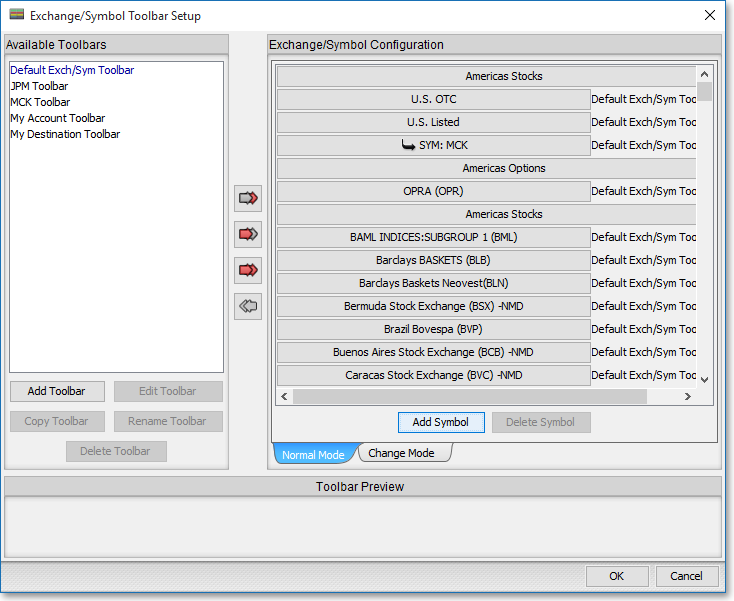
Once the "Exchange/Symbol Toolbar Setup" box appears, click Add Symbol.

Once the "Input" box appears, type the desired symbol and click OK. A new field with the entered symbol will appear in the "Exchange/Symbol Configuration" section of the "Exchange/Symbol Toolbar Setup" box.
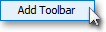
Next, click Add Toolbar.
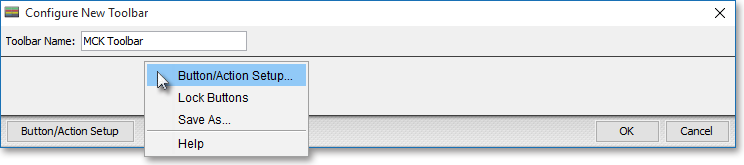
Once the "Configure New Toolbar" box appears, type the desired toolbar name into the "Toolbar Name" field.
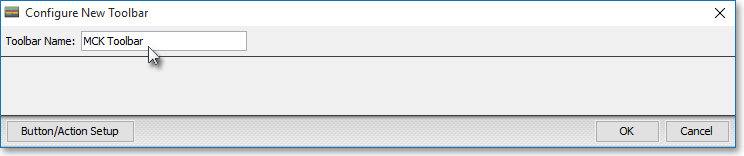
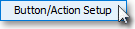
Next, either select the Button/Action Setup button or right-click the space below the "Toolbar Name" field and select Button/Action Setup from the menu that appears.
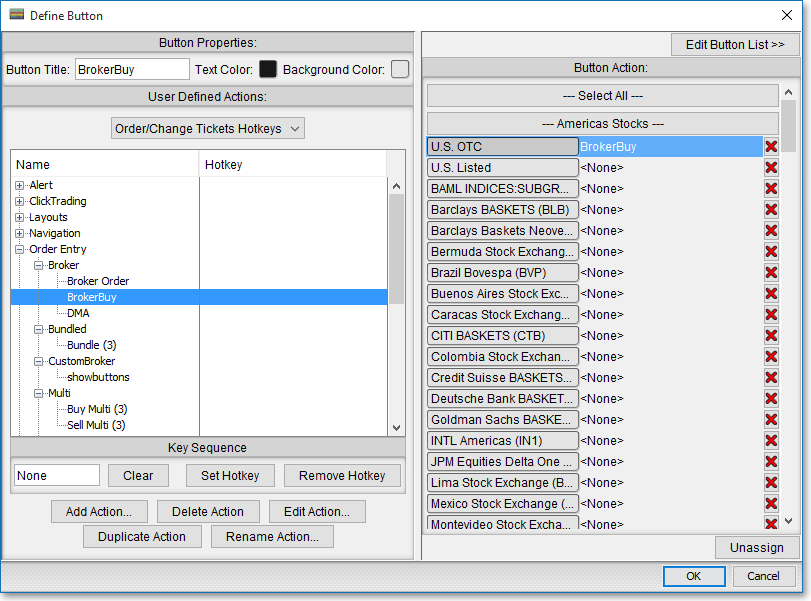
Once the "Define Button" box appears, create the desired perimeters for your Action Button and click OK.
Note: For further information regarding the "Define Button" box, refer to the "Adding Action Buttons to Action Button Panels" section of the "Montage" chapter in Neovest's Help documentation.
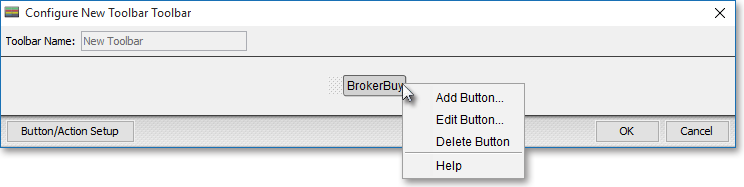
A preview of the Action Button you created will appear in the "Configure New Toolbar" box. You may add as many Action Buttons as you wish.
Note: To add, edit, or delete a button, right click the Action Button preview.
Once you have finished, click OK.
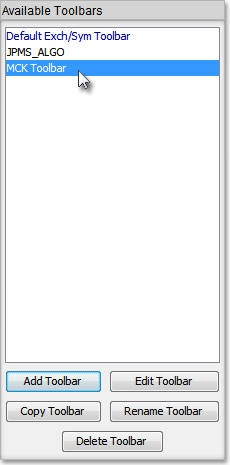
The newly created toolbar will appear in the "Available Toolbars" section of the "Exchange/Symbol Toolbar Setup" box. You may create as many toolbars as you wish.
Next, click to highlight a symbol in the "Exchange/Symbol Configuration" section and the toolbar you would like to assign it.
Note: All fields in the "Exchange/Symbol configuration" section are initially assigned the "Default Exch/Sym Toolbar."

The arrows located in the center of the "Exchange/Symbol Toolbar Setup" box provide a number of actions for assigning a toolbar to a symbol. Refer to the following table for more information:
| Feature: | Description: |
Append Selected Toolbar to End of List |
Adds the selected toolbar to the end of the toolbars listed beside the highlighted symbol. This causes the buttons assigned to the toolbar to appear after the previously listed toolbar buttons. |
Insert Selected Toolbar to Beginning of List |
Adds the selected toolbar to the beginning of the toolbars listed beside the highlighted symbol. This causes the buttons assigned to the toolbar to appear before the previously listed toolbar buttons. |
Replace List With the Selected Toolbar |
Deletes the toolbars listed beside the highlighted symbol and replaces them with the selected toolbar. |
Remove Selected Toolbar from List |
Removes the selected toolbar from the toolbars listed beside the highlighted symbol. |
Once you have assigned the desired toolbar(s) to the desired symbol(s), click OK.
Enter the symbol with the assigned Swappable Action Button panel into the symbol field on an open Montage window. The Action Button(s) assigned to the symbol will appear.