Setting Basic and Custom Alerts in an Alerts Window
Once you open a Neovest Alerts window you may set basic real-time high price, low price, volume, and block size alerts on individual symbols. Neovest also provides a variety of custom alert criteria that you may use to set percent change, moving average, fundamental data, and other types of alerts on individual symbols.
Features associated with the Alerts window also let you determine how Neovest is to notify you each time one of your basic or custom alerts is triggered. Furthermore, Neovest provides an Alerts Log that is designed to continually record your triggered alerts during the current trading day.
In addition, Neovest lets you assign order actions to basic and custom alerts, which allows you to automatically create and send orders on symbols on which basic and custom alerts are triggered.
The following instructions explain how you may open a Neovest Alerts window and set basic alerts on an individual symbol:
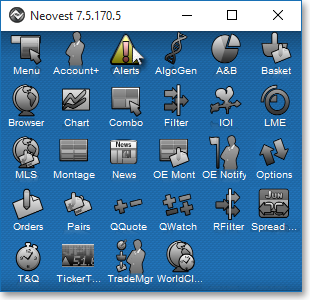
Click the "Alerts" icon on Neovest's Launch Pad.
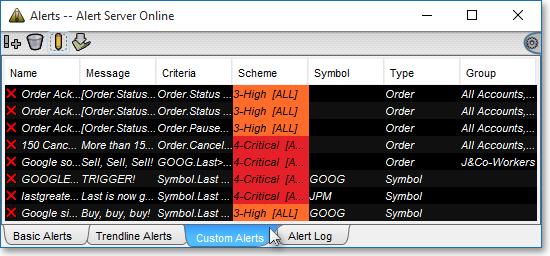
Once the Alerts window appears, click on the "Basic Alerts" tab.
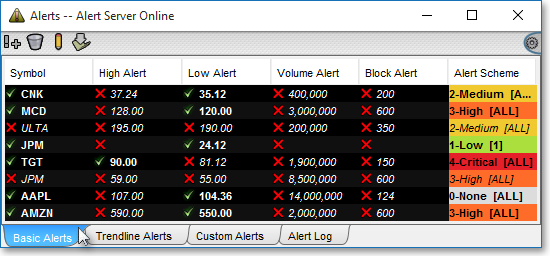
Click the "Add Alert" icon on the open Alerts window's toolbar.

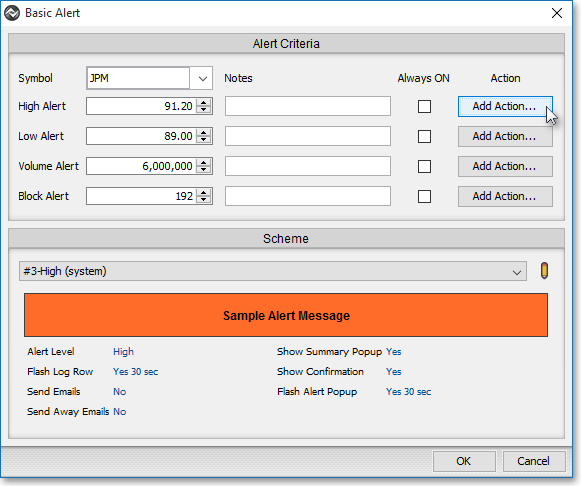
Once the "Basic Alert" box appears, type the symbol in the "Symbol" box upon which you would like to set basic alerts.
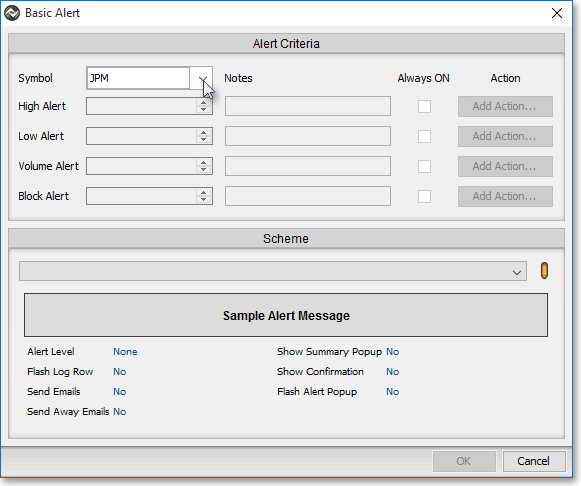
Enter the high price, low price, volume size, and block size alert values in their respective fields that you wish to set on the entered symbol.
Note: "Block" is defined in Neovest as the number of shares traded for each order. Block sizes in Neovest are divided by 100, so if you wish to set a block size alert of 10,000 shares on an individual symbol, then you must enter "100" for the "Block Alert" value.
In addition to the basic alert-setting functionality provided in the "Basic Alert" box, this box contains additional features that let you determine how Neovest is to notify you each time one of your basic alerts is triggered.
The following table provides descriptions of the additional features in the "Basic Alert" box:
| Feature: | Description: |
Link
Window Icon |
Lets you link a basic alert to all open Neovest windows that are linked to the Alerts window. If you select this feature for a particular basic alert and the alert is triggered, then all open Neovest windows that are linked to the Alerts window will display information on the symbol for which the basic alert was triggered. |
| Always On | Lets you permanently turn on a basic alert, which means that the basic alert will remain on even if the alert is triggered. If you select this feature, Neovest will continue to alert you each time the basic alert is triggered. However, Neovest will automatically disable the basic alert if the alert is triggered excessively within the span of a few seconds. |
| Action | Lets you assign an order action to a basic alert. If you assign an order action to a basic alert and the alert is triggered, then Neovest will automatically create an order for the symbol on which the basic alert was triggered. For information regarding assigning an order action to a basic alert, refer to the "Assigning an Order Action to a Basic Alert" instructions immediately following this table. |
Assigning an Order Action to a Basic Alert
Neovest lets you assign an order action to a basic alert. If you assign an order action to a basic alert and the alert is triggered, then Neovest will automatically create an order for the symbol on which the basic alert was triggered.
The following instructions explain how you may assign an order action to a basic alert:
Click on the Add Action button to the right of the basic alert to which you would like to assign an order action.
Once the "High Alert Action Configuration" box appears, click on the "Action" down arrow to select the order action you wish to assign to the basic alert.
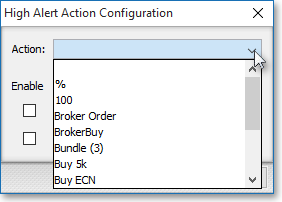
Note (1): In order for an order action to appear in the "Action" down arrow menu, you must first create the order action. For information regarding creating an order action, refer to the "Action Button" sections, paying particular attention to the "Assigning an Action" section, in the Montage chapter in Neovest's Help documentation.
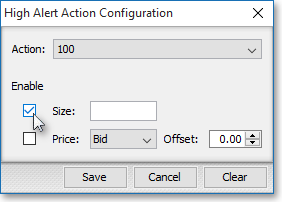
Note (2): The "Alert Action Configuration" box also lets you specify certain components of an order action. In this box you may specify the "Size," "Price," and "Offset" of an order action before you assign it to a basic alert. The following instructions explain how you may specify certain components of an order action before you assign it to a basic alert:
Check the boxes to the left of the order action components (i.e., "Size," "Price," and "Offset") that you wish to specify.
Enter the information you wish in the "Size," "Price," and "Offset" fields that you have selected.
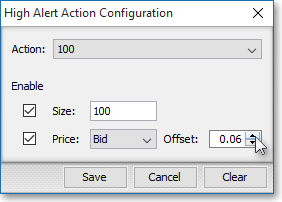
Click Save.

Note: Once the basic alert to which you have assigned an order action is triggered, Neovest will open the "Order Confirmation" box, which will let you review the order information on the symbol on which the basic alert was triggered.
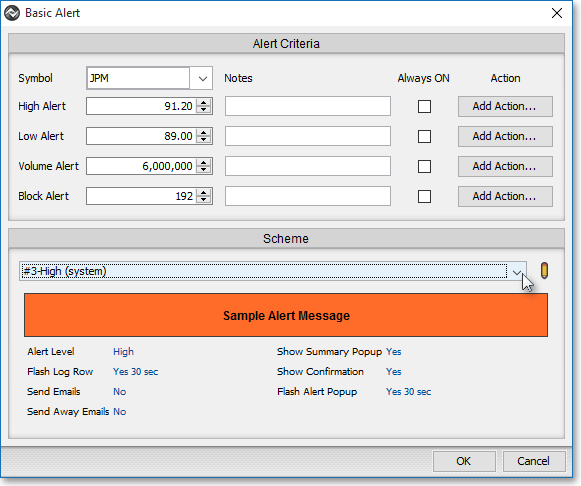
Lastly, in the "Scheme" field, click on the drop-down menu, and select the alert scheme you wish to apply to the basic alert. You may add new schemes to or edit existing schemes on the drop-down menu by clicking on the "Manage Schemes" pencil.
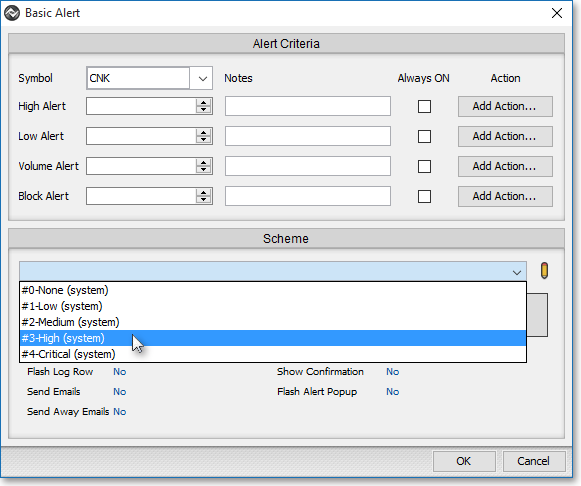
Note: Schemes are designed to let you further customize each basic alert, including how the alert will appear and the severity of each alert notification. In Neovest's "Alert Schemes," which you may access by clicking on the Manage Schemes pencil, you may decide in what type of alert popup your alerts will appear, whether the alert popup itself must be confirmed before it closes, whether or not the alert notification will continue flashing and in what color, and if the Alert Log window will appear once a particular alert is triggered. For further information, refer to the "Alert Schemes Tab" section in the "Alerts" chapter in Neovest's Help documentation.
Once you finish establishing the basic alert criteria you wish in the "Basic Alert" box, click OK.

Note: Once you set basic alerts on an individual symbol, the criteria of the basic alerts on the symbol will appear in the Alerts window. You may continue at this point to set additional basic alerts if you wish. There is no limit to the number of basic alerts that you may set.
The following instructions explain how you may set a custom alert on an individual symbol:
Click the "Alerts" icon on Neovest's Launch Pad.
Once the Alerts window appears, click on the "Custom Alerts" tab.
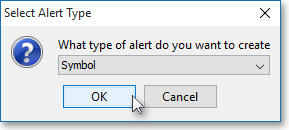
Click the "Add Alert" icon on the open Alerts window's toolbar.

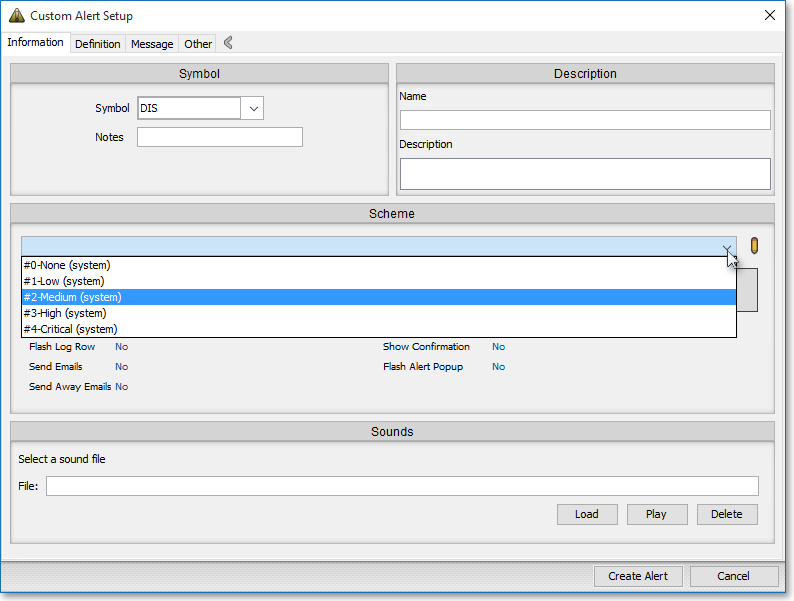
Once the "Custom Alert Setup" box appears, type the symbol in the "Symbol" box upon which you would like to set a custom alert. (In the following example, "DIS" is selected as the symbol.)
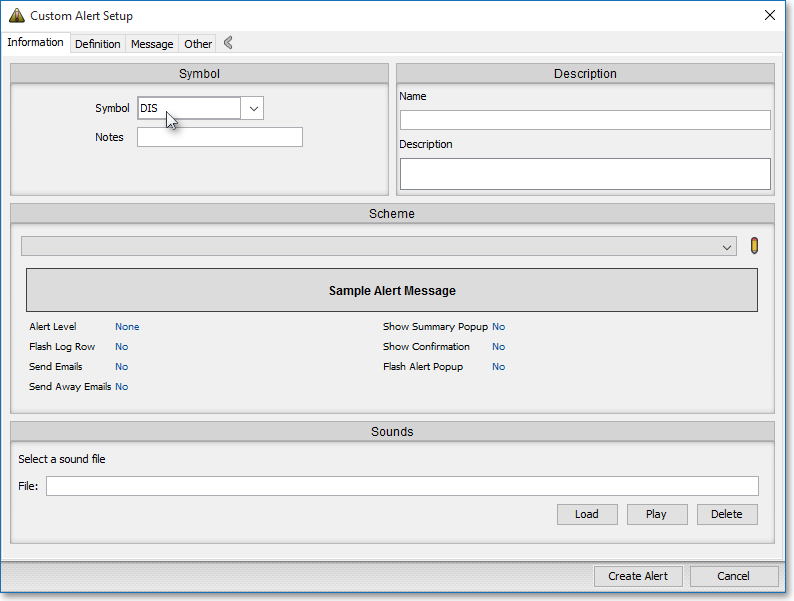
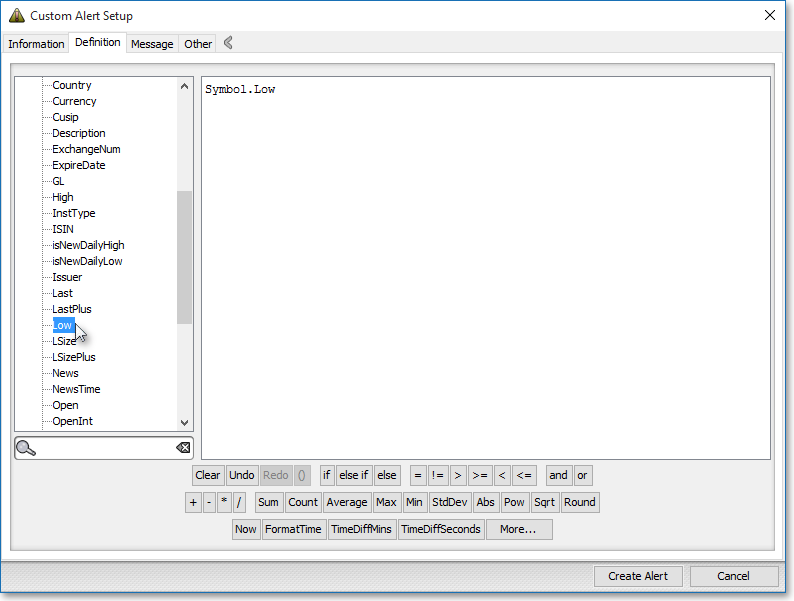
Next, click the "Definition" tab at the top of the window. Then, double-click the display field that you wish to use as the first component of the custom alert from the left column. (In the following example, "Low" is selected as the first display field.)
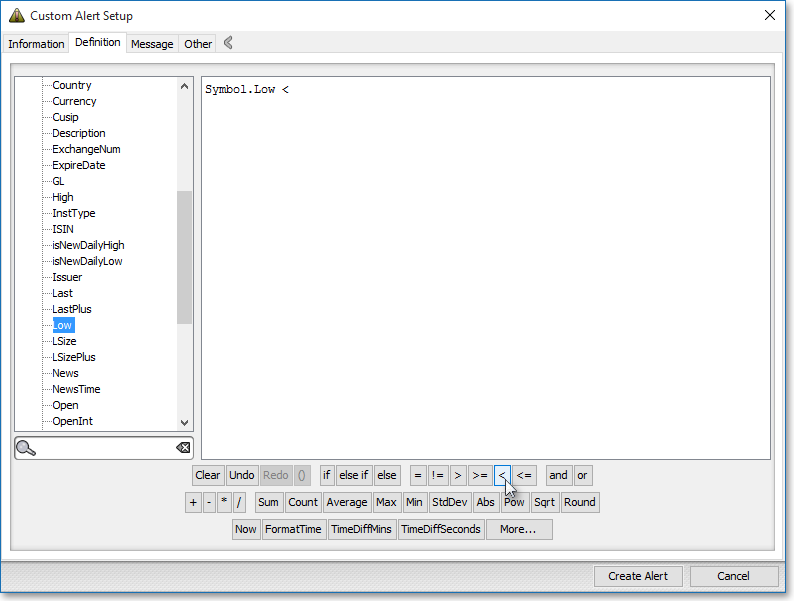
Next, select the condition. (In the following example, the less-than sign ("<") is selected as the condition.)
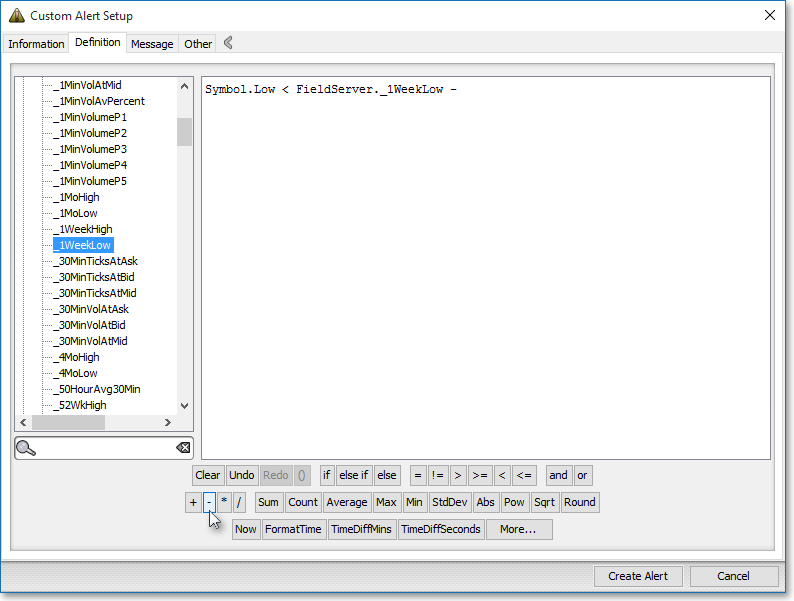
Next, select the display field that you wish to use as the second component of the custom alert. (In the following example, "1WeekLow" is selected as the second display field.)

Note: At this point the custom alert that you created for the symbol DIS may be considered complete. In the preceding example, the custom alert is set to notify you once the current low price of DIS drops below its lowest price of the past week. As with all custom alerts, you may consider a custom alert complete once you enter a symbol and select a first and second display field and a condition. However, you may add additional criteria to a custom alert, as the following instructions demonstrate:
Next, select the math operator. (In the following example, the minus sign ("-") is selected as the math operator.)
Lastly, type the value you wish to complete the additional criteria for the custom alert. (In the following example, "1" is entered as the value.)
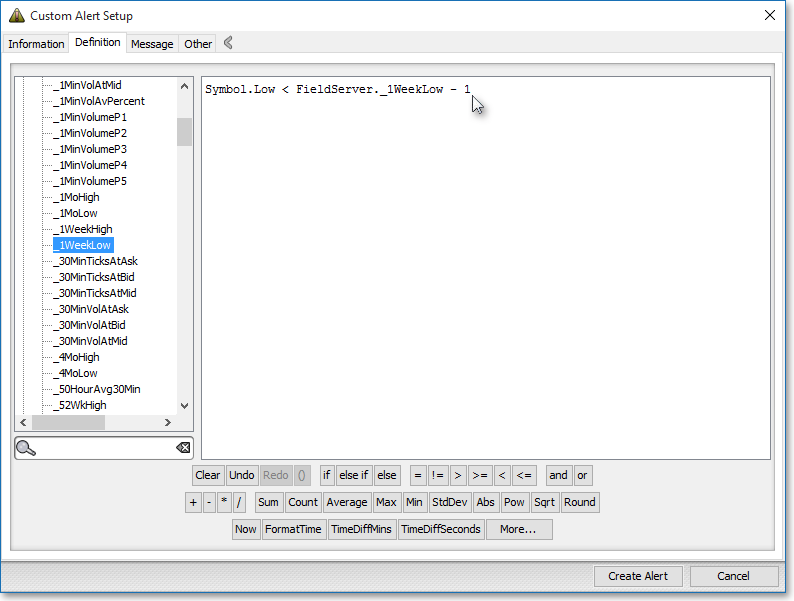
Note (1): By adding these last two criteria to the custom alert, you have specified that you wish to be alerted once the current low price of DIS drops below its lowest price of the past week by at least $1.
Note (2): To assist you in creating custom alerts, Neovest provides descriptions of its display fields. To access the descriptions of the display fields that Neovest provides, refer to the "Display Fields" chapter of Neovest's Help documentation.
In addition to the custom alert-setting functionality provided in the "Custom Alert" box, this box contains additional features that let you determine how Neovest is to notify you each time one of your custom alerts is triggered.
The following table provides descriptions of the additional features in the "Custom Alert" box:
| Feature: | Description: |
Link
Window Icon |
Lets you link a custom alert to all open Neovest windows that are linked to the Alerts window. If you select this feature for a particular custom alert and the alert is triggered, then all open Neovest windows that are linked to the Alerts window will display information on the symbol for which the custom alert was triggered. |
| Always On | Lets you permanently turn on a custom alert, which means that the custom alert will remain on even if the alert is triggered. If you select this feature, Neovest will continue to alert you each time the custom alert is triggered. However, Neovest will automatically disable the custom alert if the alert is triggered excessively within the span of a few seconds. |
| Show Pop-up | Lets you activate the pop-up box feature associated with a custom alert. If you select this feature, then Neovest will alert you via a pop-up box once the custom alert is triggered. Once the pop-up box appears on your screen, indicating that the custom alert has been triggered, Neovest may permit you to change the criteria of the custom alert and reset the alert if the criteria is of such a nature that it may be changed and reset. |
| Action | Lets you assign an order action to a custom alert. If you assign an order action to a custom alert and the alert is triggered, then Neovest will automatically create an order for the symbol on which the custom alert was triggered. For information regarding assigning an order action to a custom alert, refer to the "Assigning an Order Action Custom Alert" instructions immediately proceeding this table. |
Assigning an Order Action to a Custom Alert
Neovest lets you assign an order action to a custom alert. If you assign an order action to a custom alert and the alert is triggered, then Neovest will automatically create an order for the symbol on which the custom alert was triggered.
The following instructions explain how you may assign an order action to a custom alert:
Click on the "Other" tab at the top of the "Custom Alert Setup" window. Then, click the Action button in the "Action" section of the window.

Once the "Action Configuration" box appears, click on the "Action" down arrow to select the order action you wish to assign to the custom alert.
Note: In order for an order action to appear in the "Action" down arrow menu, you must first create the order action. For information regarding creating an order action, refer to the "Action Button" sections, paying particular attention to the "Assigning an Action" section, in the Montage chapter in Neovest's Help documentation.
Note: The "Alert Action Configuration" box also lets you specify certain components of an order action. In this box you may specify the "Size," "Price," and "Offset" of an order action before you assign it to a custom alert. The following instructions explain how you may specify certain components of an order action before you assign it to a custom alert:
Check the boxes to the left of the order action components (i.e., "Size," "Price," and "Offset") that you wish to specify.
Enter the information you wish in the "Size," "Price," and "Offset" fields that you have selected.
Click Save.
Note: Once the custom alert to which you have assigned an order action is triggered, Neovest will open the "Order Confirmation" box, which will let you review the order information on the symbol for which the custom alert was triggered.
Lastly, in the "Alert Scheme" field, click on the drop-down menu, and select the alert scheme you wish to apply to the custom alert. You may add new schemes to or edit existing schemes on the drop-down menu by clicking on Manage Alert Schemes.
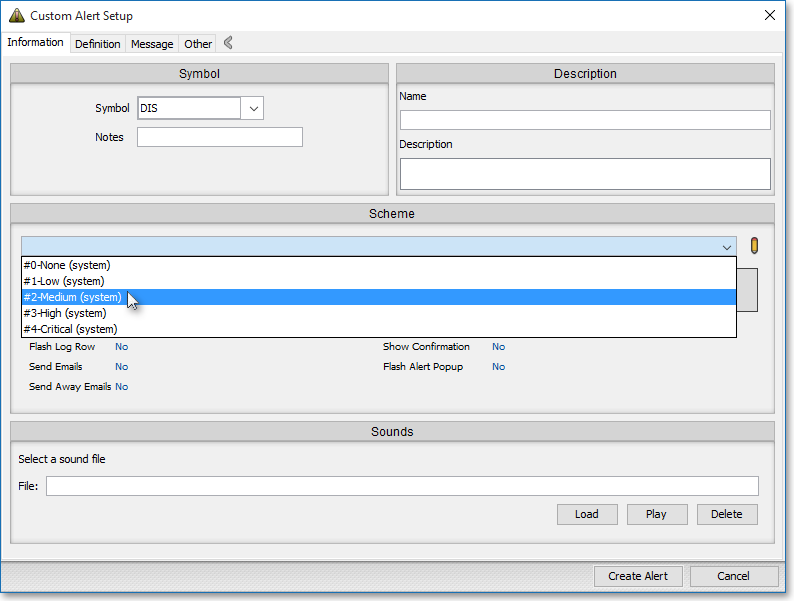
Note: Alert schemes are designed to let you further customize each custom alert, including how the alert will appear and the severity of each alert notification. In Neovest's "Alert Scheme Wizard," which you may access by clicking on the Manage Alert Schemes button, you may decide in what type of alert popup your alerts will appear, whether the alert popup itself must be confirmed before it closes, whether or not the alert notification will continue flashing and in what color, and if the Alert Log window will appear once a particular alert is triggered. For further information, refer to the "Alert Schemes Tab" section in the "Alerts" chapter in Neovest's Help documentation.
Once you finish establishing the custom alert criteria you wish in the "Custom Alert Setup" box, click OK.
Note: Once you set custom alerts on an individual symbol, the criteria of the custom alerts on the symbol will appear in the Alerts window. You may continue at this point to set additional custom alerts if you wish. There is no limit to the number of custom alerts you may set.