Blotter Descriptions
Neovest's Basket window provides you with the functionality to (1) view your current portfolio, (2) target the positions that you wish to add to or remove from your current portfolio, (3) view and execute the orders that will allow you to achieve your target portfolio, and (4) view a current record of your Basket window trading activity.
Neovest's Basket window is comprised of four main sections: (1) the "Initial Portfolio" section, (2) the "Target Portfolio" section, (3) the "Blotter" section, and (4) the "Summary" section.
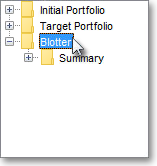
The Blotter section lets you view and execute the orders that will allow you to achieve your target portfolio, or you may automatically load or manually enter one or more orders and trade directly from the Blotter section. The Blotter section not only contains several display fields that let you view the individual components of each displayed order, but it also provides several user-friendly features that let you change the components of a single displayed order or of multiple displayed orders simultaneously.
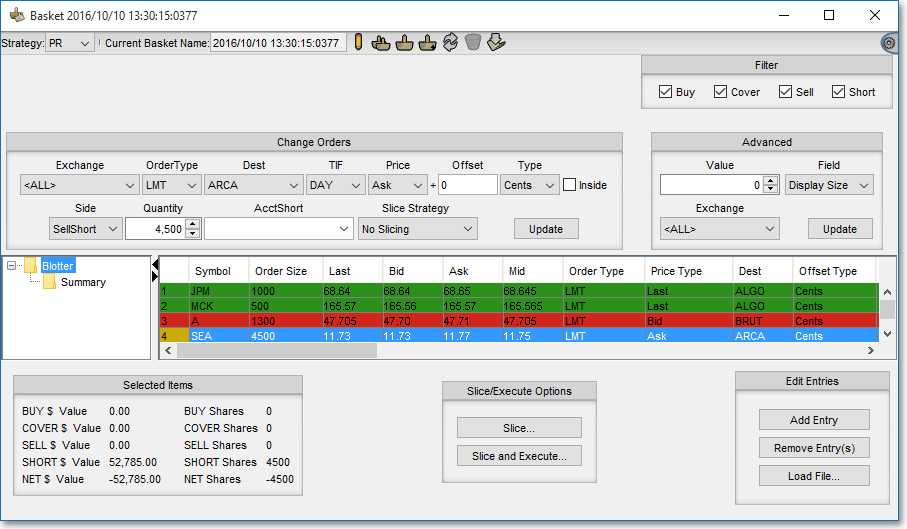
For instance, Neovest lets you quickly change the "Order Type" (i.e., limit or market), "Dest" (destination), "TIF" (time in force), "Price," and so on of any order displayed in the Blotter section. In addition, features in the Blotter section let you specify a price offset and specify whether or not you wish to be inside the market for any of your OTC or listed security orders.

Neovest also lets you select a liquidity slicing strategy that you have previously created to slice your large Basket orders into multiple smaller orders for the purpose of minimizing market impact. By way of definition, Neovest refers to each initial large Basket window order that you wish to slice as the "parent" order and each smaller order resulting from the parent order being sliced as a "child" order.
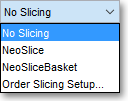
Using Neovest's proprietary slicing algorithm, you may (1) determine minimum and maximum share sizes and percentages for each child order, (2) specify do-not-send price parameters that will require each child order to fall within a specific price range before it is sent, (3) enter minimum and maximum time delays that will determine random pauses between the sending of each child order, and (4) determine automatic cancel and replace time and price settings that will allow you to cancel or replace your sent child orders if they have not been filled after a certain amount of time and are a certain price away from the current market price.
Once you set up, name, and save a liquidity slicing strategy and it appears on a drop-down menu in a Neovest Basket window, you may select the liquidity slicing strategy on the menu, thus indicating that you wish Neovest's Strategy Server to use your selected strategy to automatically slice the Basket window orders you choose.
Whereas Neovest's proprietary slicing algorithm automatically slices your orders based on your criteria, Neovest also lets you manually slice your orders that are displayed in the Blotter section. Using percentages, you may slice your orders into two, three, four or any number of slices and execute your smaller sliced orders when you choose. Once you slice and execute one or more orders in the Blotter section, you may turn to the Summary section to view current information regarding your Basket window trading activity.
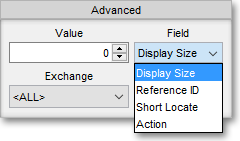
Neovest also lets you add advanced components to particular OTC or listed orders that are displayed in the Blotter section in a Basket window. In the features in the "Advanced" section, you may add "Display Size," "Reference ID," and "Short Locate" information as well as Order Entry "Actions" to individual orders or a group of orders.
Additional features let you click on "Buy," "Sell," "Cover," or "Short" in the "Filter" field in the Blotter section to filter the orders by side that you wish to see in a Basket window.

The following tables provides descriptions of certain components in the Blotter section in a Neovest Basket window. By using the following tables as guides to the Blotter section, you may easily (1) view certain components of each displayed order, (2) change certain components of a single displayed order or of multiple displayed orders simultaneously, (3) specify a price offset and specify whether or not you wish to be inside the market for any of your OTC or listed security orders, (4) slice your large orders into smaller, non-market-influencing orders, (5) send your smaller sliced orders within certain times of one another, (6) specify various parameters for your sliced orders, (7) add advanced components to particular OTC or listed orders, and (8) filter your orders by side.
| Feature: | Description: |
| Change Orders | Lets you change the components
(i.e., "Order Type," "Dest," "TIF," "Price,"
etc.) of a single displayed OTC or listed security order or of multiple displayed
OTC or listed security orders simultaneously. In this section you may also select a particular liquidity slicing strategy via the "Slice Strategy" drop-down menu to be used in connection with a single OTC or listed order or a group of OTC or listed orders that are displayed in the Blotter section. In order for one or more liquidity slicing strategies to appear on the "Slice Strategy" drop-down menu, you must have first set up one or more strategies. Neovest's Strategy Server is designed to let you set up various liquidity slicing strategies that you may then use to slice your large orders into multiple smaller orders for the purpose of minimizing market impact. By way of definition, Neovest refers to each initial large order that you wish to slice as the "parent" order and each smaller order resulting from the parent order being sliced as a "child" order. Using Neovest's proprietary slicing algorithm, you may (1) determine minimum and maximum share sizes and percentages for each child order, (2) specify do-not-send price parameters that will require each child order to fall within a specific price range before it is sent, (3) enter minimum and maximum time delays that will determine random pauses between the sending of each child order, and (4) determine automatic cancel and replace time and price settings that will allow you to cancel or replace your sent child orders if they have not been filled after a certain amount of time and are a certain price away from the current market price. Once you set up, name, and save a liquidity slicing strategy and it appears on the "Slice Strategy" drop-down menu in a Neovest Basket window, you may then select the liquidity slicing strategy on the menu to be used in connection with a single OTC or listed order or a group of OTC or listed orders that are displayed in the Blotter section. Once the particular order or orders are sent from the Blotter section, a "Confirm" box will automatically open with the criteria that Neovest's Strategy Server will use to slice the order or orders. If the order criteria meets your approval and you wish to continue with the liquidity slicing of the order or orders, you may click Send in the "Confirm" box to cause Neovest's Strategy Server to begin utilizing the liquidity slicing strategy criteria you specified to slice your large parent Basket order or orders into multiple smaller child orders. For more information regarding how you may use Neovest's Strategy Server to set up a liquidity slicing strategy that you may use in a Neovest Basket window to slice your large parent Basket orders into smaller child orders, refer to the "Liquidity Slicing Strategy" section in the "Basket" chapter of Neovest's Help documentation. For information regarding how you may change the components of your OTC or listed security orders, refer to the "How to Change the Components of Your Orders" instructions immediately following the proceeding table. |
| Filter | Lets you click on "Buy," "Cover," "Sell," or "Short" to filter your displayed orders in the Blotter section. For instance, if you click in the boxes to the left of "Buy," "Cover," and "Sell" to remove the check marks, Neovest will only display short orders in the Blotter section. If you click in the boxes to the left of "Buy," "Cover," and "Sell" again to replace the check marks, Neovest will again display all of your orders that were originally displayed in the Blotter section. |
| Advanced | Lets you add advanced components to a single
OTC or listed order or to a group of OTC or
listed orders that are displayed in the Blotter section. In this field, you may add "Display Size,"
"Reference
ID," and "Short Locate" information as well as
Order Entry "Actions" to individual orders or a group of orders. If you select "Display Size" in this field, then you may specify a number of shares to be displayed once you send an individual order or a group of orders from the Blotter section. Specifying a Display Size number lets you display a lower quantity of shares than the complete number displayed for each order in the "Order Size" display field in the Blotter section. This feature is useful if you wish to send one large order or a group of large orders and you do not wish to influence the price of the entered ticker symbol or symbols in either direction. If you select "Reference ID" in this field, then you may enter a name or a message that you may then attach to an individual order or a group of orders in the Blotter section. Reference IDs are used as identifiers to distinguish orders after they are sent from the Blotter section and appear in the "Summary" section in a Neovest Basket window. For example, you may enter the message, "This is the 10 a.m. basket" in connection with a group of orders that you wish to distinguish. Note: If no reference ID is specified for a particular order, then Neovest will label the order with the same name as the slice folder, or wave folder, since you cannot send an order without first slicing it. If you select "Short Locate" in this field, then you may enter a short locate from which you are certain you may borrow shares once you choose to short an equity that is not "easy-to-borrow." Once you enter a short locate, you may attach it to an individual order or a group of orders in the Blotter section. If you select "Action" in this field, then you may select any "Single Order" action that you have previously created in a Neovest Montage or Order Entry Montage window for an individual order or a group of orders in the Blotter section. "Broker Order," "Multi Order," and "Bundled Order" actions that you have previously created will not appear in the Blotter section. Regardless of the order criteria you specified during the set up process of the "Single Order" action that you wish to select, the "Single Order" action itself will only override the "Order Type" and "Destination" criteria of an individual order or a group of orders in the Blotter section. For instance, if you selected "PEG Market" as the "Order Type" and "ARCA" as the "Destination" during the set up process of the "Single Order" action that you wish to select, then Neovest will only use these two criteria from the "Single Order" action when you send an individual order or a group of orders in the Blotter section. For more information regarding creating "Single Order" actions, refer to the "Assigning an Action" and "Single Order Action" sections in either the "Montage" or "OE Montage" chapters of Neovest's Help documentation. In order to change the values associated with "Display Size," "Reference ID," "Short Locate" and "Actions," first select one of these features by clicking on the "Field" drop-down menu. Next, either enter or select the OTC or listed "Value" you wish in connection with the "Field" feature you selected. For more information regarding how you may change the components of your OTC or listed security orders, refer to the "How to Change the Components of Your Orders" instructions immediately following the proceeding table. |
| Selected Items | Lets you view the dollar and share values by side (i.e. "Buy," "Cover," "Sell," and "Short") of the orders that are highlighted in the Blotter section. |
| Slice/ Execute Options |
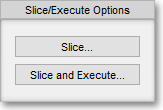
Lets you click Slice or Slice and Execute to slice or slice and execute respectively all of the orders that are currently displayed in the Blotter section. If you click Slice, then the "Slice Orders" dialog box will appear, which will enable you to specify the slicing parameters for the orders. If you click Slice and Execute, then the "Slice and Execute Orders" dialog box will appear, which will enable you to not only specify slicing parameters for the orders but will also allow you to immediately execute all of the orders that are currently displayed in the Blotter section. For information regarding how you may utilize the Slice and Slice and Execute features with your orders in the Blotter section, refer to the "Slicing Orders" section in the "Basket" chapter of Neovest's Help documentation. |
| Add Entry | Lets you add an entry (row) to the Blotter section. |
| Remove Entry | Lets you remove one or more highlighted entries (rows) from the Blotter section. |
| Load File | Lets you automatically load a file that contains one or more of your orders into the Blotter section. For information regarding how you may load a file that contains one or more of your orders into the Blotter section, refer to the "Loading a File" section in the "Basket" chapter of Neovest's Help documentation. |
| Generate List | Lets you generate the orders that must be executed in order to achieve your target portfolio. Once you enter your current portfolio in the Initial Portfolio section and your target positions in the Target Portfolio section, you may click Generate List and Neovest will (1) calculate the orders that you must execute to achieve your target portfolio and (2) display these orders in the Blotter section.
Note: In order for the Generate List feature to generate one or more orders in the Blotter section, you must first enter information in at least the Initial Portfolio section or the Target Portfolio section. Ideally, the Generate List feature is designed to generate the orders that you must execute to achieve your target portfolio once you have entered information in both the Initial Portfolio and Target Portfolio sections. However, if you have only entered your current portfolio in the Initial Portfolio section and you click Generate List, Neovest will generate the order or orders that you must execute to flatten your current portfolio. If you have only entered your target positions in the Target Portfolio section and you click Generate List, then Neovest will generate the order or orders that you must execute to equal your target portfolio. |
By using the preceding table as a guide, you may understand the individual components of the Blotter section in Neovest's Basket window.
The following table provides descriptions of the default display fields, which display the individual components of each order, contained in the Blotter section in Neovest's Basket window:
| Feature: | Description: |
| Symbol | Shows the ticker symbol for each order. |
| Order Size | Shows the total number of shares for each order. For information regarding how you may change the quantity of any of your orders, refer to the "How to Change the Components of Your Orders" instructions immediately following this table. |
| Side | Shows the side (i.e., "Buy," "Buy Cover," "Sell," or "Sell Short") for each order. For information regarding how you may change the side of any of your orders, refer to the "How to Change the Components of Your Orders" instructions immediately following this table. |
| Price Type | Lets you specify the price type for each order. Once you double-click in a cell under the "Price Type" display field, a menu will appear that will allow you to select one of several price types: "Last," "Bid," and "Ask" are self explanatory; "Mid" is defined as the midpoint price between the current bid and ask prices; and "Static" lets you define a price at which you would like the order to trade. If you select "Static," you may define your price in the cell under the "Price Offset" display field. If you select a "Price Type" other than "Static," the "Price Type" selection will be used in connection with the associated value under the "Price Offset" display field to determine the limit price at which the order will trade. For information regarding how you may change the price type for any of your orders, refer to the "How to Change the Components of Your Orders" instructions immediately following this table. |
| Price Offset | Lets you offset the price that has been selected in the "Price Type" display field for each order. For instance, if you select "Last" as the "Price Type" and you wish the order to trade five cents below the last price of the entered symbol, then you would enter "-5" or "-.05" in the appropriate cell under the "Price Offset" display field. Neovest lets you enter a variety of values under the "Price Offset" display field to specify different price offsets. For example, the number "1" equals an offset of one penny, but the value "0.01" also equals a penny; therefore, "51" entered in a single cell under the "Price Offset" display field would equal an offset of 51 cents, but "5.1" would equal five dollars and 10 cents. If you select "Static" as the "Price Type," then you may enter the exact price in the appropriate cell under the "Price Offset" display field at which you would like the order to trade. For information regarding how you may change the price offset for any of your orders, refer to the "How to Change the Components of Your Orders" instructions immediately following this table.
Note: The preceding information is only applicable if you select "Cents" as the "Offset Type" for a particular order. If "Basis" is selected as the "Offset Type," then an entirely different set of "Price Offset" rules apply. For information regarding how you may specify a price offset if "Basis" is selected as the "Offset Type," refer to the following "Offset Type" instructions. |
| Offset Type | Lets you specify an offset type, which will determine how the selected "Price Offset" will function, for each order. Once you double-click in a cell under the "Offset Type" display field, a menu will appear that will allow you to select one of two offset types: "Cents" is self explanatory. If "Basis" is selected, then Neovest will let you offset the price that has been selected in the "Price Type" display field for a particular order by a calculated number of cents. To determine the number of cents by which the selected "Price Type" will be offset, Neovest uses the formula of 100 Basis Points equals one percent of the current value of the "Price Type" ("Last," "Bid," "Ask," etc.) that you specified for the order. Therefore, if a particular symbol's current last price is 50 and you enter "20" as the value in the appropriate cell under the "Price Offset" display field, then the "Price Type" would be offset by ten cents or 0.1. For information regarding how you may change the offset type for any of your orders, refer to the "How to Change the Components of Your Orders" instructions immediately following this table. |
| Inside Market | Lets you specify that you wish to stay inside the market for each order. If you choose to check "Inside Market" for a particular order, then Neovest will ensure that the order will be executed between the current bid and ask (i.e., greater than the bid and less than the ask), regardless of any "Price Offset" value that you may have entered for the order that would have taken the order outside of the bid or the ask. |
| Destination | Lets you select a specific destination for each order. For information regarding the destinations that Neovest currently supports, refer to the "Order Entry Destinations" section in the "Orders" chapter of Neovest's Help documentation. |
| TIF (Time In Force) |
Lets you select, depending on the destination, one of several different order expiration types for each order. For information regarding the order expiration types that Neovest currently supports, refer to the "Stock Order Ticket Descriptions" section in the "Orders" chapter of Neovest's Help documentation. |
| Order Type | Lets you select, depending on the destination, one of several different order types for each order. For information regarding the order types that Neovest currently supports, refer to the "Stock Order Ticket Descriptions" section in the "Orders" chapter of Neovest's Help documentation. |
| Account | Shows the account for each order. For information regarding how you may change the account of any of your orders, refer to the "How to Change the Components of Your Orders" instructions immediately following this table. |
| AcctCompany | Shows the name of the company where the trading account resides. |
| AcctShort | Shows the name of the company where the short trading account resides. |
| Slicing Strategy | Lets you select one of three different types of slicing strategies for each order. Once you double-click in a cell under the "Slicing Strategy" display field, a menu will appear that will allow you to select "No Slicing," "Order Slicing Setup," or a particular slicing strategy that you have already created. If you select "No Slicing," then you are indicating that you do not wish to slice a particular order. If you select "Order Slicing Setup," then the "Define Order Slicing" box will appear, which will let you utilize Neovest's proprietary algorithm to automatically slice your orders, which enables you to (1) slice your orders into smaller orders, (2) send your smaller sliced orders within certain times of one another, and (3) specify various do-not-send parameters for your sliced orders. For information regarding how you may utilize slicing strategies with any of your orders, refer to the "Strategy Server" chapter in Neovest's Help documentation. Lastly, if you select a particular slicing strategy that you have already created, then Neovest will use the predefined slicing strategy for the highlighted order. |
| Last, Bid, Ask, Mid |
Displays the current last, bid, ask, and mid prices of each entered symbol. "Mid" is defined as the midpoint price between the current bid and ask prices. |
| Display Size | Lets you enter a display size for each order, which lets you display a lower number of shares than the complete quantity displayed in the "Order Size" display field in the Blotter section. This feature is useful if you wish to send a large order and you do not wish to influence the price of the entered ticker symbol in either direction. For information regarding how you may enter a display size for any of your orders, refer to the "How to Change the Components of Your Orders" instructions immediately following this table. |
| Ref. ID | Lets you enter a reference ID for each order, which lets you enter a name or a message that you may then attach to a particular order. Reference IDs are used as identifiers to distinguish orders after they are sent from the Blotter section and appear in the "Summary" section in a Neovest Basket window. For example, you may enter the message, "This is the 10 a.m. basket" in connection with an order that you wish to distinguish.
Note: If no reference ID is specified for a particular order, then Neovest will label the order with the same name as the slice folder, or wave folder, since you cannot send an order without first slicing it. For information regarding how you may enter a reference ID for any of your orders, refer to the "How to Change the Components of Your Orders" instructions immediately following this table. |
| Short Locate | If you select "Short Locate" in this field, then you may enter a short locate from which you are certain you may borrow shares once you choose to short an equity that is not "easy-to-borrow." Once you enter a short locate, you may attach it to an individual order or a group of orders in the Blotter section. For information regarding how you may enter a short locate for any of your orders, refer to the "How to Change the Components of Your Orders" instructions immediately following this table. |
| Action | If you select "Action" in this field, then you may select any "Single Order" action that you have previously created in a Neovest Montage or Order Entry Montage window for an individual order or a group of orders in the Blotter section. "Broker Order," "Multi Order," and "Bundled Order" actions that you have previously created will not appear in the Blotter section. Regardless of the order criteria you specified during the set up process of the "Single Order" action that you wish to select, the "Single Order" action itself will only override the "Order Type" and "Destination" criteria of an individual order or a group of orders in the Blotter section. For instance, if you selected "PEG Market" as the "Order Type" and "ARCA" as the "Destination" during the set up process of the "Single Order" action that you wish to select, then Neovest will only use these two criteria from the "Single Order" action when you send an individual order or a group of orders in the Blotter section. For more information regarding creating "Single Order" actions, refer to the "Assigning an Action" and "Single Order Action" sections in either the "Montage" or "OE Montage" chapters in Neovest's Help documentation. For information regarding how you may select a "Single Order" action for any of your orders, refer to the "How to Change the Components of Your Orders" instructions immediately following this table. |
| Broker Strategy | Lets you select one of several unique third-party broker algorithmic strategies to apply to your order. Once you select a broker strategy in this field for a particular order and click Update in the "Change Orders" section, the Basket window will display a "Broker Strategy Settings" section that will let you specify settings for the particular order that are specific to the broker algorithmic strategy that you selected. For example, if you select JPMorgan ("JPMS") as the destination and select "VWAP" as the broker strategy, then Neovest will display JPMorgan's "Volume Weighted Average Price" algorithmic strategy parameters in the "Broker Strategy Settings" section, which will let you specify settings for the particular order based on JPMorgan's VWAP broker strategy.
Note: Each destination provides its own unique broker strategies; therefore, as you select different destinations, the selections in the "Broker Strategy" display field drop-down menu will change. Neovest does not provide descriptions of the broker strategies that are offered by each destination due to their proprietary nature. For information on the broker strategies that are offered by various destinations, contact your Neovest account manager. |
How to Change the Components of Your Orders
Neovest lets you change the components ("Order Type," "Dest," "TIF," "Price," etc.) of a single displayed OTC or listed security order or of multiple displayed OTC or listed security orders simultaneously in the Blotter section in a Basket window.
The
following instructions explain how you may change a single component of a single
displayed order in the Blotter section in a Neovest Basket window:
Double-click in the cell corresponding to the component that you wish to change
for a single displayed order. For instance, double-click in the cell under the
"Side" display field if you wish to change the side for a single displayed
order.

Note: If you double-click in a cell under the "Side," "Price Type," "Offset Type," "Destination," "TIF," "Order Type," "Account," "Slicing Strategy," "Action," or "Broker Strategy" display fields, a drop-down menu will appear that will allow you to select the side, price type, offset type, and so on that you wish for the single displayed order. If you double-click in a cell under the "Symbol," "Order Size," "Price Offset," "Display Size," "Ref. ID," or "Short Locate" display fields, the cell will allow you to enter new information for the single displayed order.
If you have double-clicked in a cell under the "Side," "Price Type," "Offset Type," "Destination," "TIF," "Order Type," "Account," "Slicing Strategy," "Action," or "Broker Strategy" display fields, select the component that you wish from the drop-down menu.

OR
If you have double-clicked in a cell under the "Symbol," "Order Size," "Price Offset," "Display Size," "Ref. ID," or "Short Locate" display fields, enter the new information you wish for the single displayed order.

The following instructions explain how you may change the components of a single displayed order or of multiple displayed orders simultaneously in the Blotter section in a Neovest Basket window:
Click on the row number corresponding to the order whose components you wish to change. For instance, if you wish to change the components of the order that is located on row "4," simply click on the number "4," and the entire row will become highlighted.

Note: At this point you may choose to highlight more than one row if you wish to change the components of more than one of your orders simultaneously. Neovest provides you with a number of ways to highlight more than one row in the Blotter section. For instance, if you wish to select a number of rows that are not in consecutive order in the Blotter section, simply press and hold the Ctrl key while you click on the row numbers that you wish to highlight. Additionally, if you wish to select a number of rows that are in consecutive order in the Blotter section, simply click on the number of the first row in the consecutive list of rows that you wish to highlight, then press and hold the Shift key, and then click on the number of the last row.
Make the changes you wish to the components in the "Change Orders" field for the highlighted orders. For instance, if you wish to change the sides of the highlighted orders, simply click on the "Side" down arrow in the "Change Orders" field, and select "Buy," "BuyCover," "Sell," or "SellShort" for the highlighted orders. Similarly, if you wish to change the order sizes of the highlighted orders, simply click on either the up or the down "Quantity" arrows in the "Change Orders" field to increase or decrease respectively the order sizes of the highlighted orders.
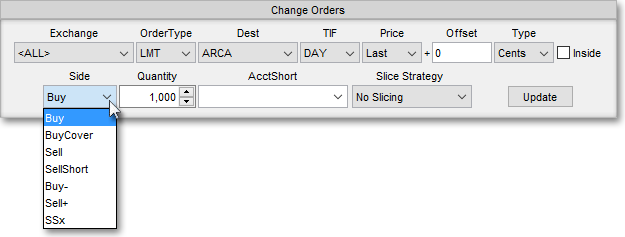
Click Update in the "Change Orders" field.

The following instructions explain how you may change an entire column of components simultaneously for all of the displayed orders in the Blotter section:
Click on the display field corresponding to the entire column of components that you wish to change for the displayed orders in the Blotter section. For instance, if you wish to change all of the sides simultaneously for all of the displayed orders, simply click on the "Side" display field to highlight the entire column of "Side" components.

Make the changes you wish to the component in the "Change Orders" field to change the entire column of components simultaneously for all of the displayed positions. For instance, if you clicked on the "Side" display field, simply click on the "Side" down arrow in the "Change Positions" field to change the entire column of sides for all of the displayed positions. Similarly, if you clicked on the "Order Size" display field, simply click on either the up or the down "Quantity" arrows in the "Change Positions" field to increase or decrease the order sizes respectively for all of the displayed positions.
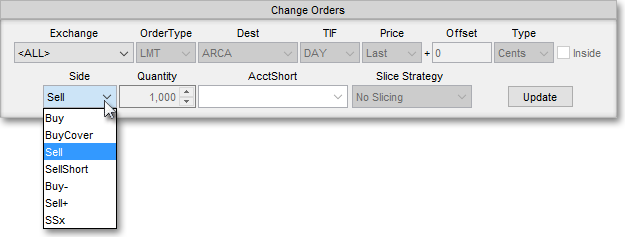
Click Update in the "Change Orders" field.
