Creating a Futures Spread
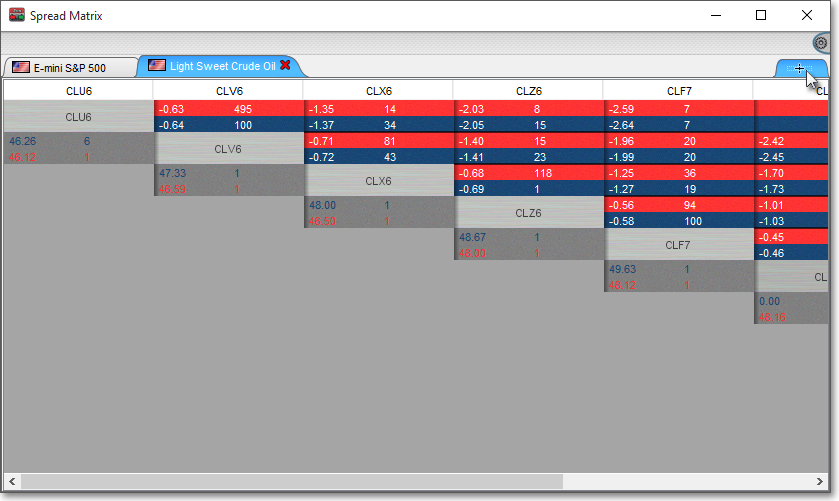
Neovest's Spread Matrix window flexibility lets you (1) view spread comparisons for a range of futures contracts, (2) determine the number of Depth of Book levels and the maximum number of futures contracts to load, (3) specify whether the displayed spread data should appear directly from its applicable exchange or if it should first be calculated by Neovest, and (4) trade directly from the Spread Matrix window itself.
The following instructions explain how you may create a futures spread, configure the view, and trade in a Neovest Spread Matrix window:
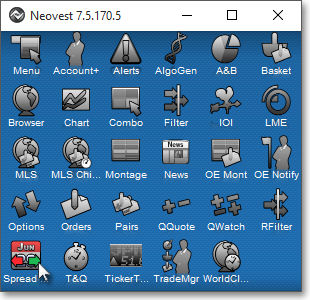
Click the "Spread Matrix" icon on Neovest's Launch Pad.
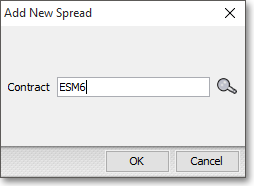
Once the Spread Matrix window appears, type the contract you wish in the "Add New Spread" box, and press OK.
Note: The contract "ESM6," which is the S&P 500 EMINI June 2016 contract, is used in the following example.
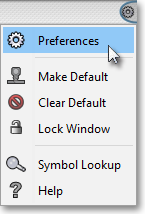
With a Spread Matrix window open on your screen, click the gear icon located on the far-right of the toolbar.

Click the "Preferences" icon on the drop-down menu that appears.
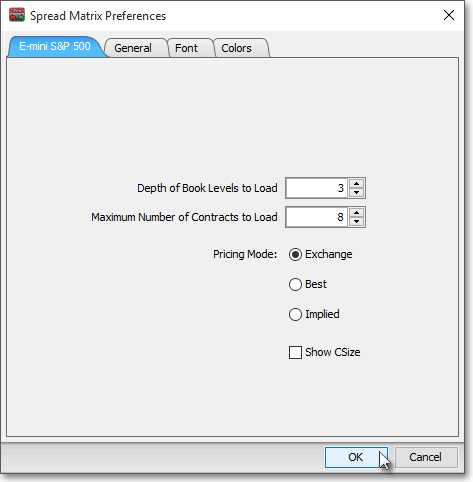
Once the "Spread Matrix Preferences" box appears, specify the number of "Depth of Book Levels," "Maximum Number of Contracts," and the "Pricing Mode" you wish to load, and click OK.
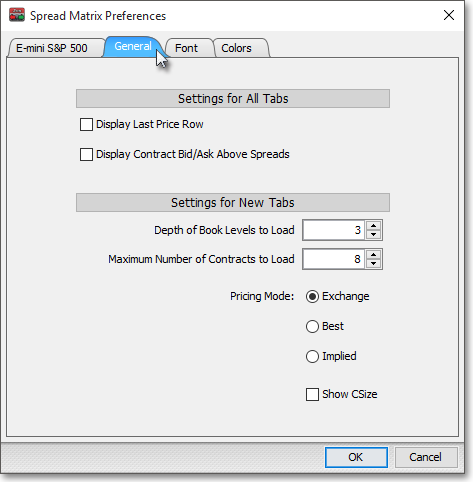
Note: Once your specified number of levels and contracts load within the tab in which you are working, you may choose to change the way the data you see are calculated. For information regarding how you may specify your spread data calculations, refer to the "General Tab" instructions in the Spread Matrix Preferences section of Neovest's Help documentation.
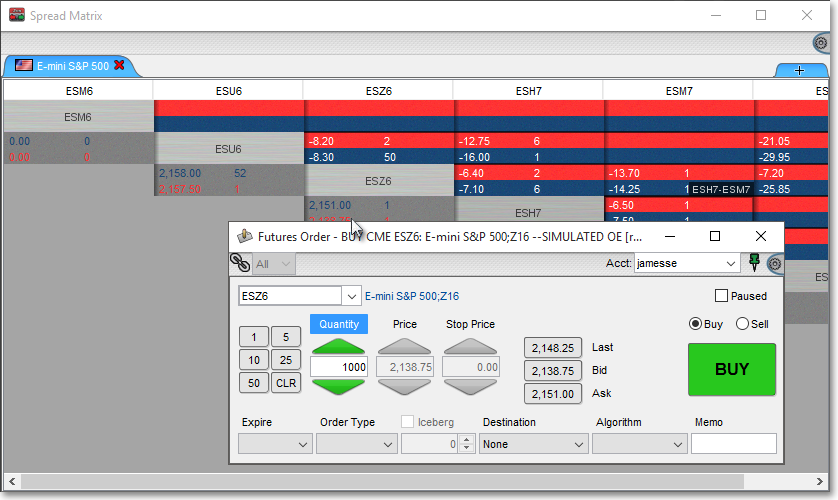
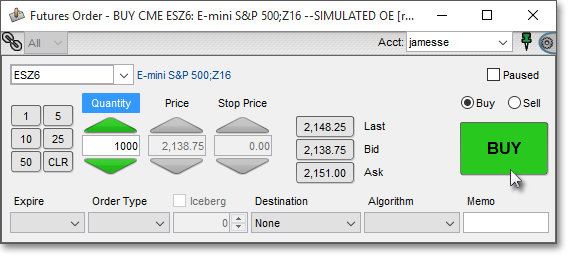
Click on any spread data associated with a specific contract to populate a Neovest Futures Order ticket with your selected contract-specific information.
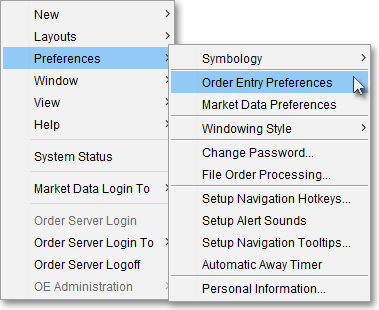
Note: For you to trade directly from a Neovest Spread Matrix window, you must first click Menu | Preferences | Order Entry Preferences and then select the "Click Trading" tab once the "Order Entry Preferences" box appears.
Within the "Click Trading" tab, first click Level II and then specify within the "Futures" section, in either the "Left Click Settings" or "Right Click Settings" tab, the Style of the ticket you prefer and whether you wish to Buy or Sell within each of the drop-down menus associated with the "Bid," "BSize," "Ask," and "ASize" columns. You may also specify before clicking OK whether you wish to load Bid, BSize, Ask, and ASize data and their totals within futures-supported Neovest windows.
Note: You may click trade from two places: either directly from the Spread Matrix window or from the “mini-montage” that pops up when you right-click on either the spread price OR the individual contract prices.
To click trade directly from Spread Matrix, you must have the Level I "Left Click" click trading enabled and configured for futures.
The click trading info below applies to when you click on the “mini-montage” box that pops up when you right click on one of the above-mentioned prices.
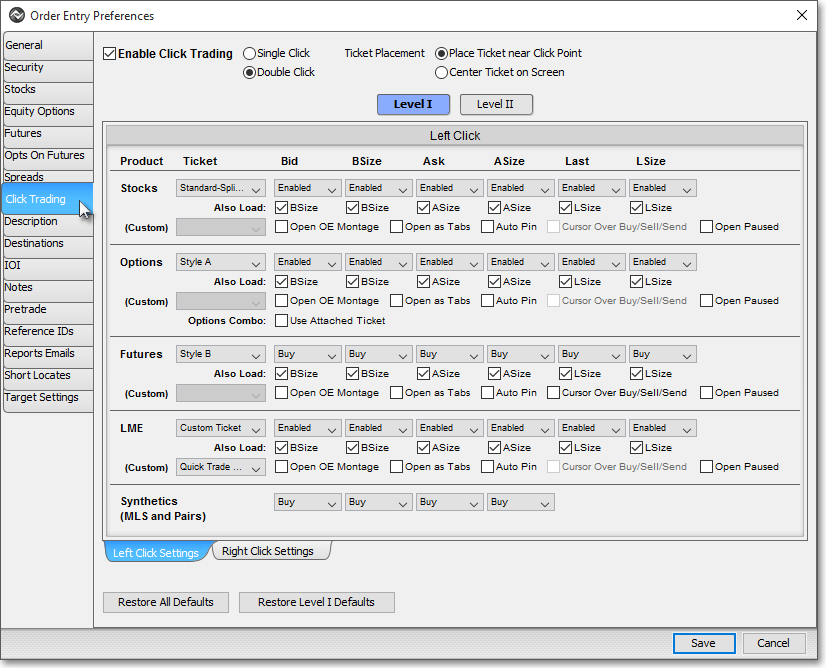
Note: For more information regarding the features in the Click Trading tab, refer to the "Click Trading Tab" instructions in the Order Entry Preferences section of Neovest's Help documentation.
Once a Neovest Futures Order ticket appears populated with contract-specific information, review your futures order ticket information and click either Buy or Sell to execute the order.
Note: If you wish to open multiple tabs within a Spread Matrix window, which will allow you to view multiple futures spread contracts, simply click on the plus sign (+) to access the "Add New Spread" box to enter a new futures contract and open a new and separate tab.